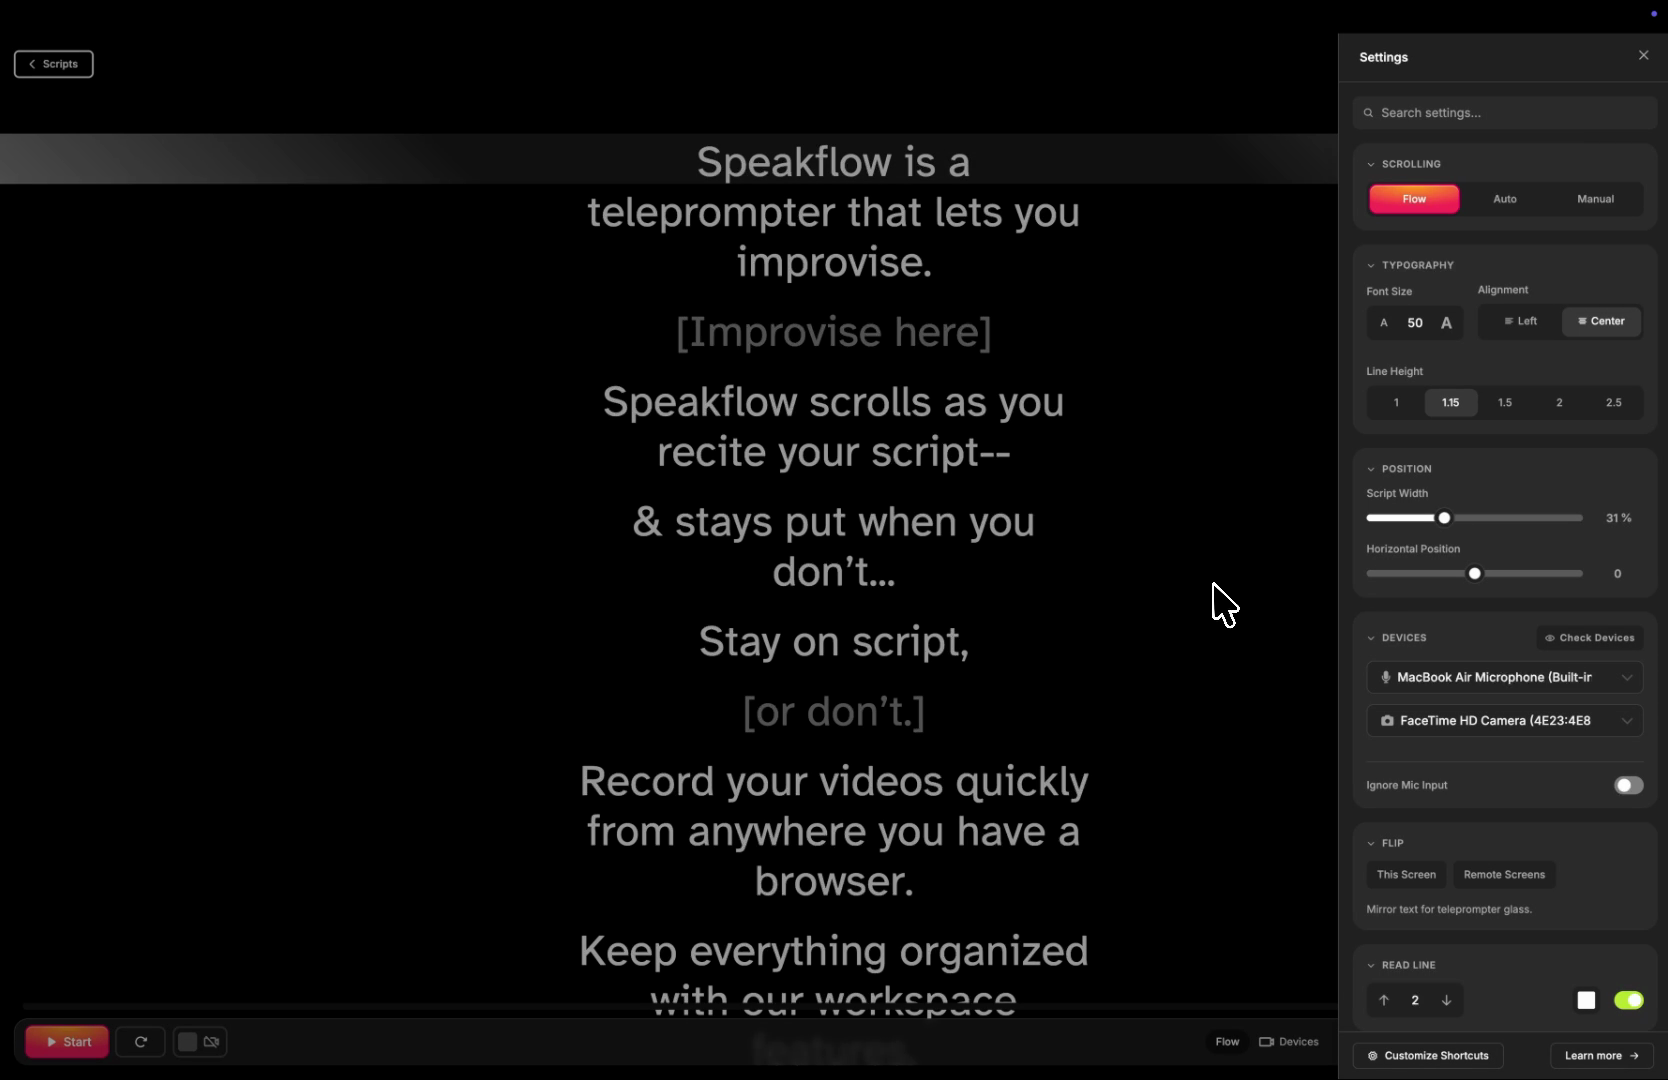
A tour of the teleprompter screen — the bottom bar, scroll modes, recording, bookmarks and keyboard shortcuts.
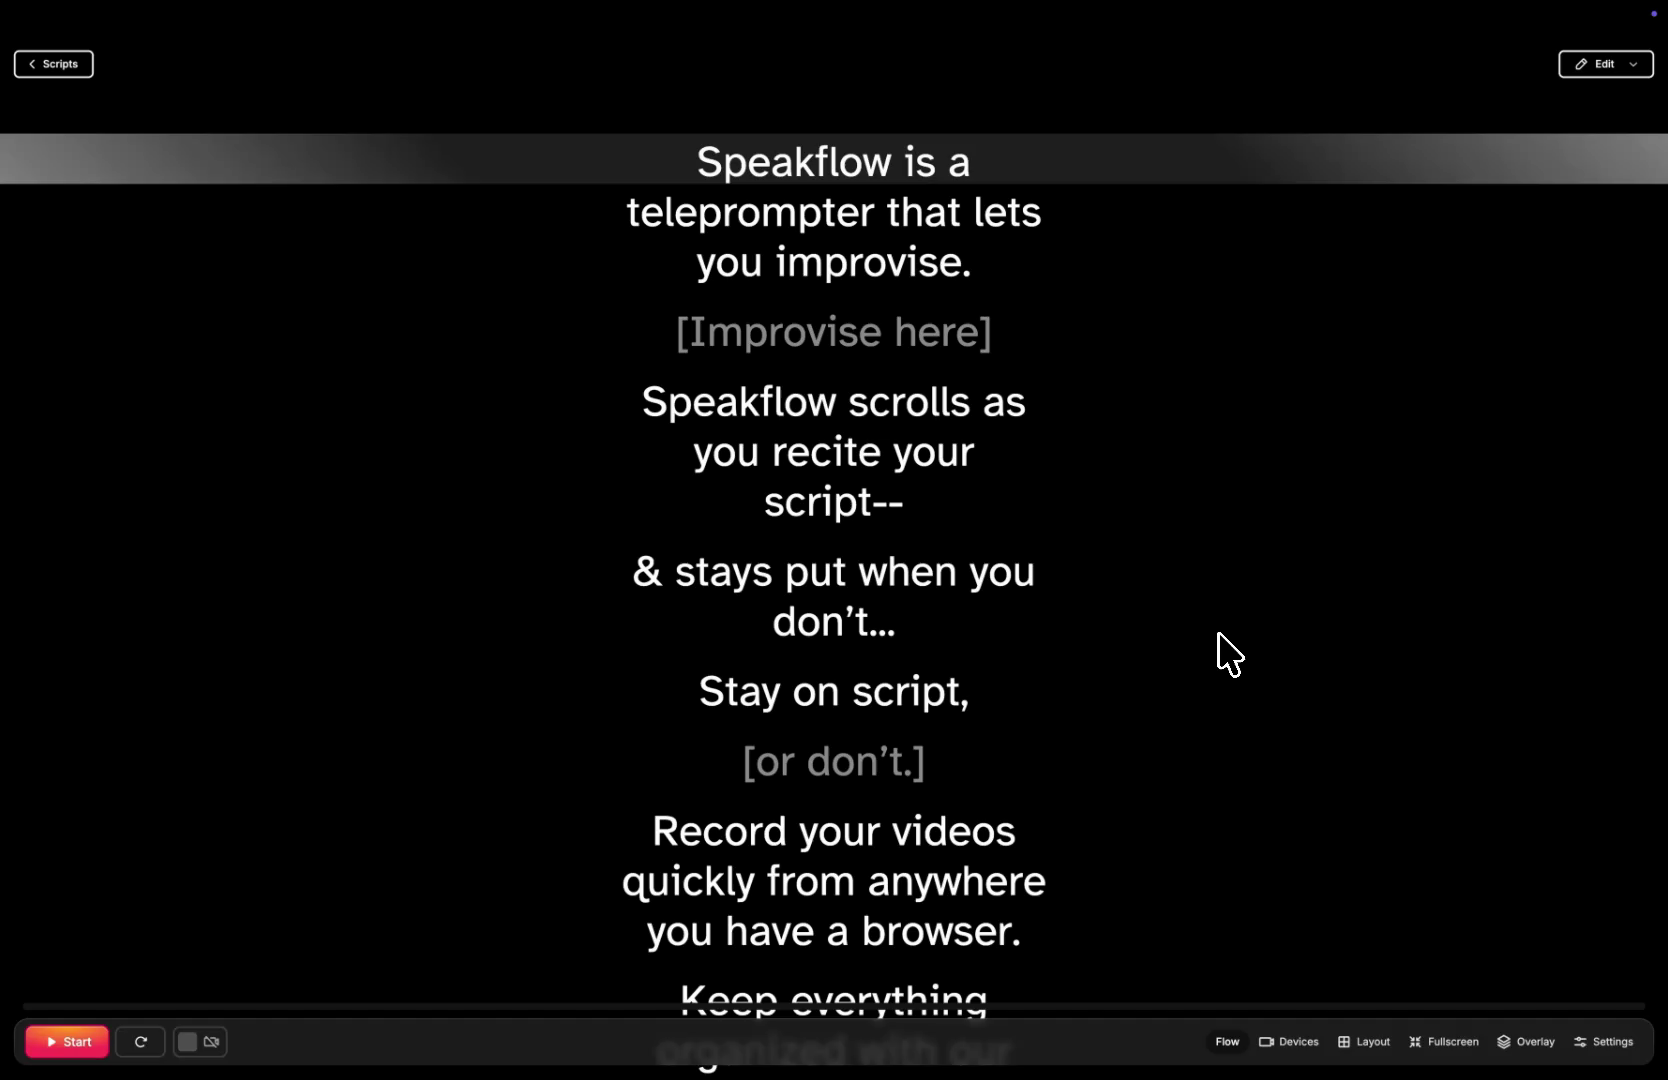
The presentation screen is where you actually read your script. Once your script is written, this is the page you'll spend your time on — it's your teleprompter, your camera, your recorder and your remote all in one.
Everything you need lives in the bar at the bottom of the screen. This guide walks through it from left to right, then covers what happens while you're reading.
presentation_screen.png220.38 KB
The presentation bar
The bar floats at the bottom of the screen and holds every control you'll reach for mid-session:
Timer — how long you've been reading
Start / Stop — begin and end a take
Restart — jump back to the top
Record video — capture yourself while you read
Mode — Flow, Auto or Manual, plus your Auto speed
Devices — pick your camera and microphone
Layout — script width and position
Fullscreen — hide everything but your script
Overlay — put your script over Zoom, Meet, slides or anything else
Settings — the full settings drawer
Once you press Start, the bar slides out of the way after three seconds so nothing sits between you and your script. Move your mouse (or tap, on a touchscreen) and it comes right back.
Timer and progress
The timer on the far left counts up while you read, and it keeps counting across takes — stop, collect yourself, start again, and the total keeps going. That makes it easy to see how long a full read actually takes.
Just above the bar is a thin progress track that fills as you move through your script, so you can tell at a glance how much you have left. Any bookmarks you've set appear as markers along it.
If you're syncing devices, the timer is kept in step across all of them.
Start and stop
There are three ways to get going:
Click Start in the bottom left
Press the Spacebar
Click any word in your script to jump there first, then start
Press Spacebar again — or click Stop — to stop. The button changes to Stop while you're running, so you can always tell what state you're in.
If you have video recording armed, a five-second countdown appears before recording begins. Press Esc during the countdown to back out.
A couple of things worth knowing about Flow mode specifically: if Speakflow hears nothing for 30 seconds it stops on its own and lets you know, so a forgotten session doesn't run forever. And on the free plan, Flow takes are capped at two minutes — Auto and Manual takes are unlimited.
Restart
Restart sends you back to the top of the script and resets your place and timer. Handy between takes. The keyboard shortcut is R.
Record video
The video toggle next to Restart records you through your webcam while you read, so your eyeline stays on the script instead of darting to a separate recording app.
Flip it on and you'll see "Press start to record". From there, pressing Start begins the countdown and then the recording. When you stop, Speakflow uploads and processes the take — you'll get a "Processing your video…" message, and you can close it and keep working. When it's ready, a Watch video button appears.
You'll need to allow camera and microphone access the first time. Recording and storing videos is included on paid plans.
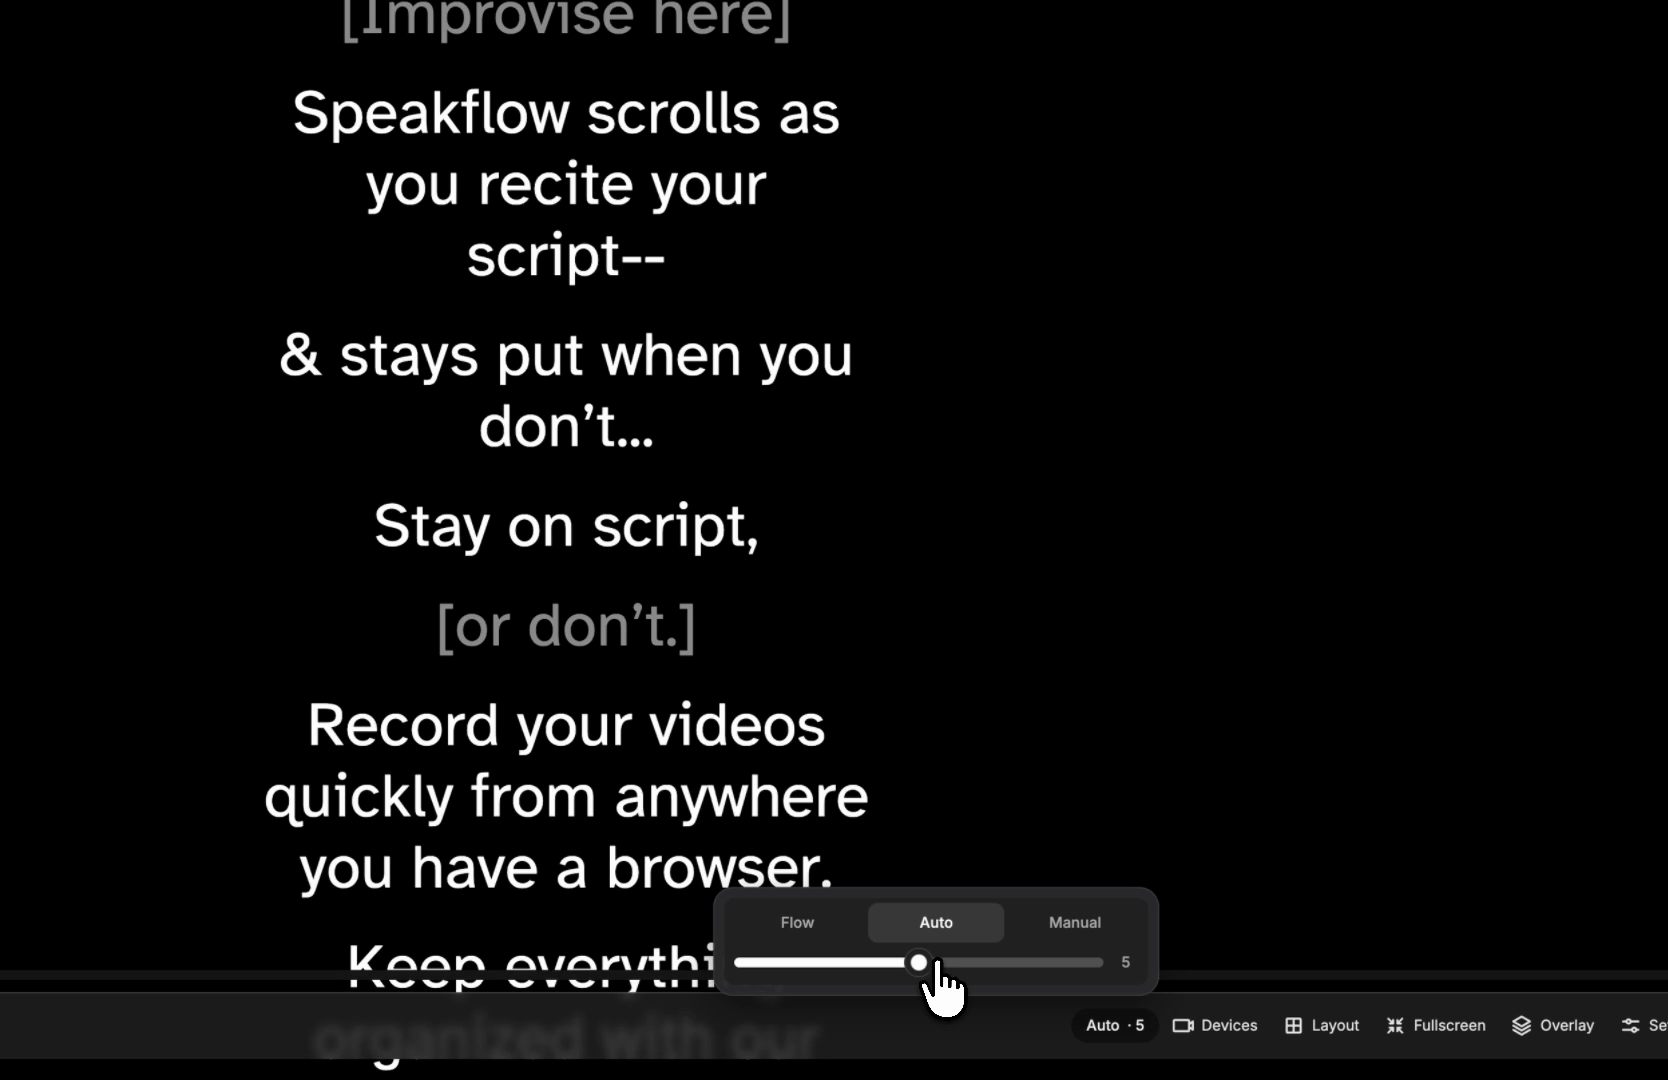
The mode pill shows which scroll mode you're in. Click it to switch:
Flow — the script scrolls as you speak, keeping pace with you. This is the default.
Auto — the script scrolls at a fixed speed you set. When Auto is selected, a speed slider appears right below the mode buttons, and the pill shows your current speed (0 is slowest, 10 is fastest).
Manual — nothing scrolls on its own. You drive it with your mouse, trackpad, touchscreen or a remote.
You can also switch modes without opening anything: F for Flow, M for Manual, A for Auto.
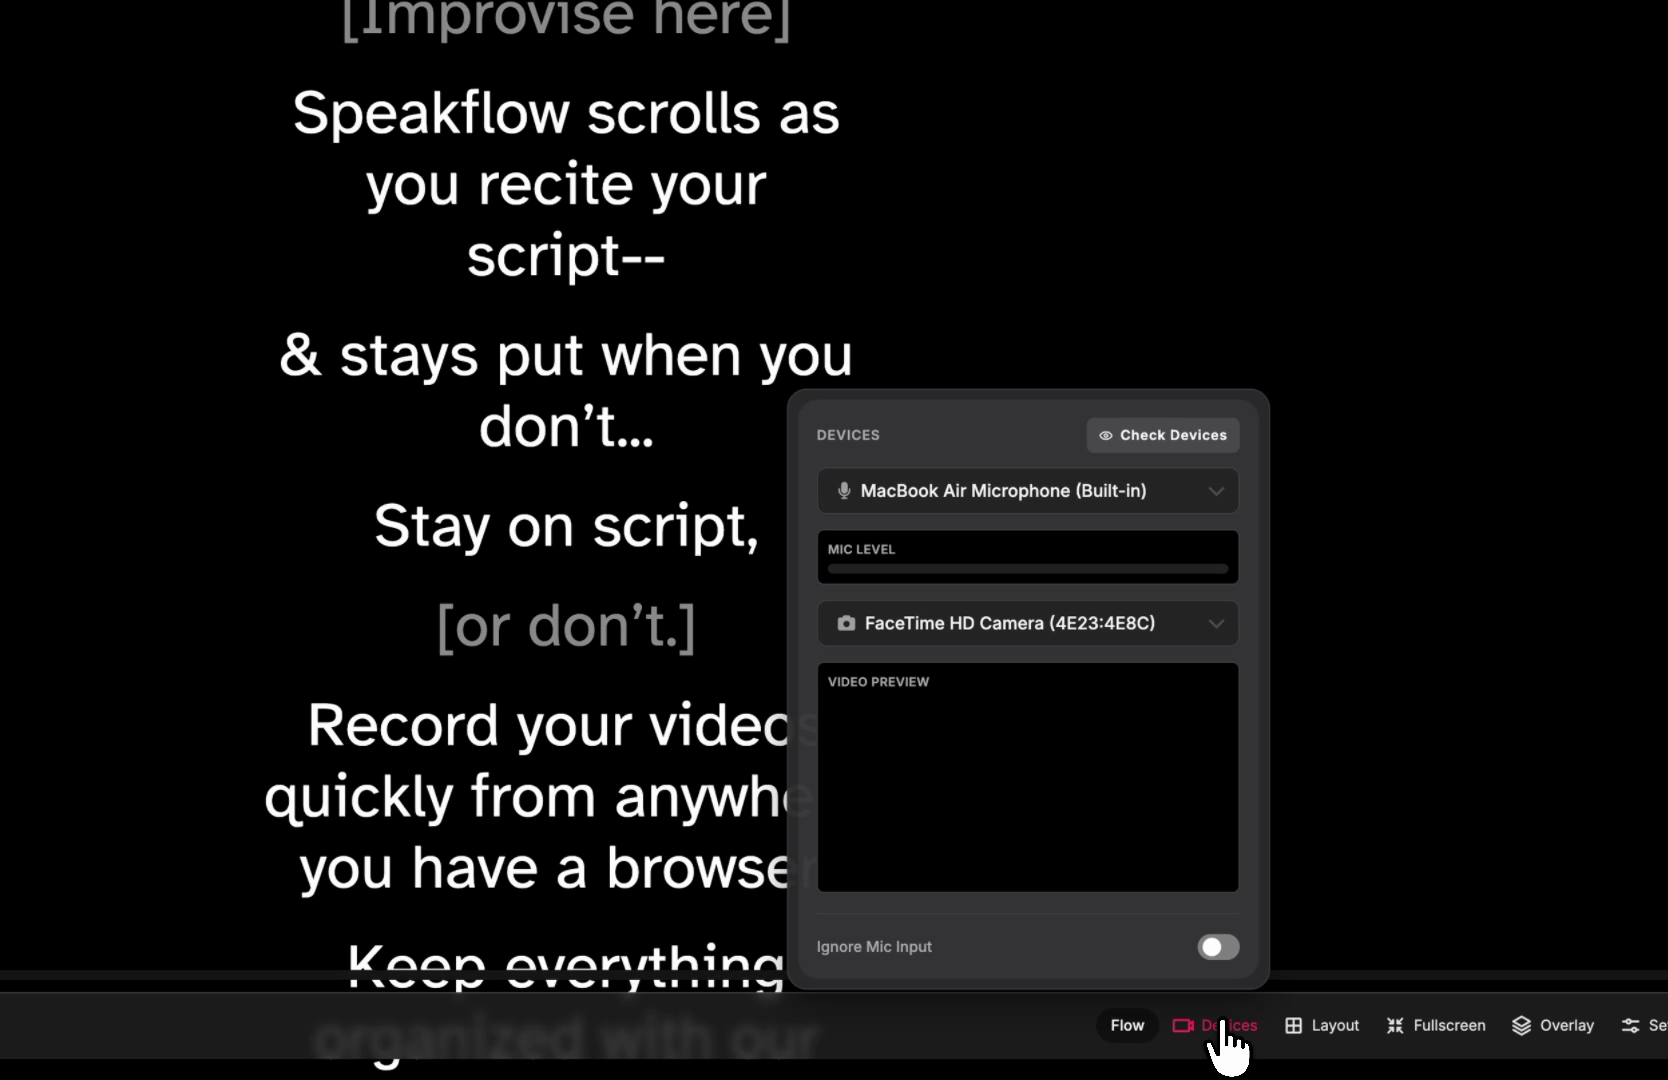
The Devices button is where you choose which camera and microphone Speakflow uses. Two things here save a lot of headaches:
Check Devices shows a live preview, so you can confirm you're on the right camera and that your mic is actually picking up sound before you start — not after a ruined take.
If a yellow "!" badge appears on the Devices button, your browser hasn't granted camera or microphone access. Open the panel and follow the prompt to fix it.
There's also an Ignore Mic Input toggle. Turn it on when this particular device shouldn't listen — for example, a second screen that's only there to display the script while you speak into a different machine.
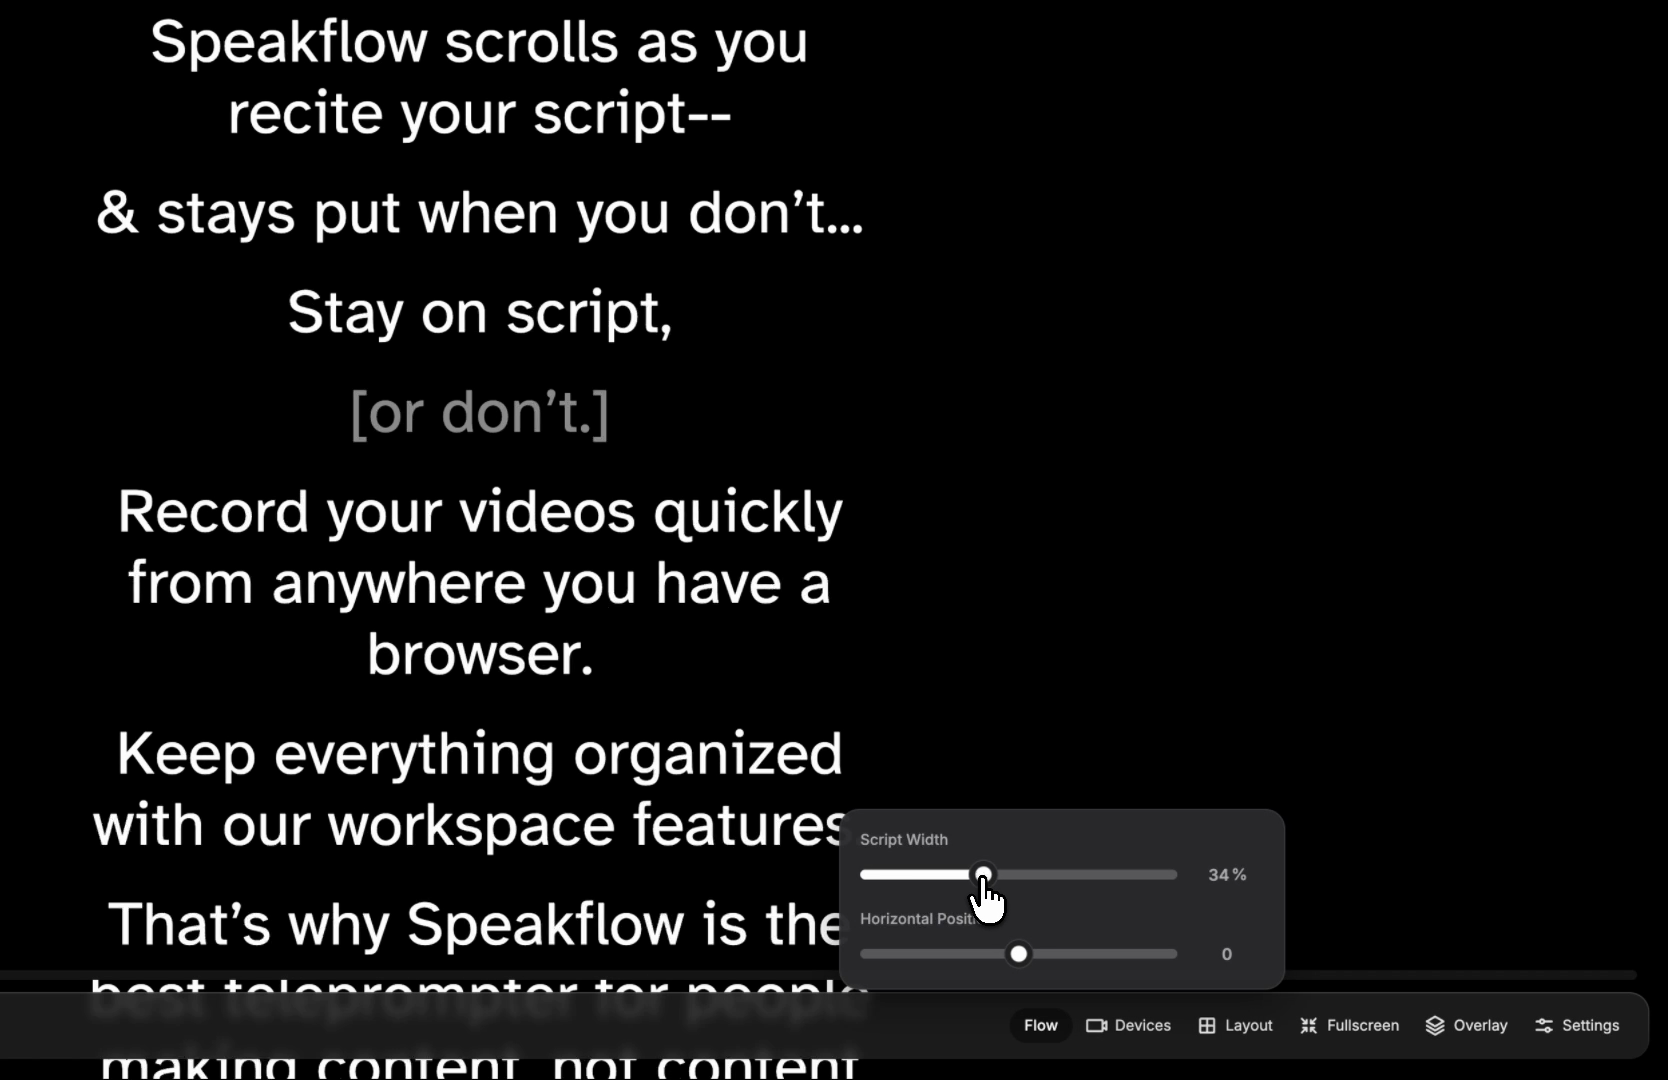
Layout controls how your script sits on the screen.
Script Width narrows or widens the column of text. Narrower columns mean fewer words per line and less side-to-side eye movement, which reads more naturally on camera — this is one of the highest-impact settings on the whole screen, and it's worth experimenting with.
Horizontal Position slides the whole column left or right. Useful when your camera sits off-center and you want the text directly beneath the lens.
script_width.png340.84 KB
Fullscreen
Fullscreen hides your browser chrome so the script fills the display. Combined with the bar auto-hiding once you start, you get a clean, distraction-free read.
Overlay
Overlay lets you keep your script on screen while you work in another app — reading over a Zoom or Meet call, or over your slides.
Overlay is included on paid plans. The first time you use it, Speakflow will point you to the desktop app, which has a stronger version of this feature: a true floating window that stays on top of everything and is invisible when you share your screen.
The Settings button opens a drawer on the right with everything that doesn't need to be one click away — text size, alignment, line height, mirroring for teleprompter glass, the read line, and device syncing. There's a search box at the top, so if you know what you're looking for you can type it rather than hunt.
Two things in there are worth calling out because people often go looking for them in the bottom bar:
Read line — a coloured guide line across the screen that marks where to read. It's off by default. Turn it on in the Read Line section, move it up or down, and choose its colour.
Sync / QR codes — View QR Codes is how you get your script onto a second device. Scan the code from your phone or tablet and the two devices stay in step. There's also Sync Device Width, which sets every connected screen to the same script width.
A few things that aren't buttons, but change how the screen feels once you know about them:
Click any word to jump to it. The words behind it dim, so your place is always obvious.
Scroll to set your starting point. Before you press Start, scrolling the script moves where you'll begin — no need to click precisely.
Bookmarks. Hover a paragraph and a bookmark button appears in the left margin. Click it to mark that spot, then jump between bookmarks with the . and , keys. Bookmarks also show up as markers on the progress track. They fade out of the way once you start reading.
Words in [square brackets] are skipped. In Flow mode, anything wrapped in brackets is ignored when Speakflow listens for your place — useful for names, jargon and anything a dictionary wouldn't know.
Keyboard shortcuts
The defaults:
Start / Stop — Space
Restart — R
Flow mode — F
Auto mode — A
Manual mode — M
Increase Auto speed — =
Decrease Auto speed — −
Next line — Down arrow
Previous line — Up arrow
Next bookmark — .
Previous bookmark —
Widen script — ]
Narrow script — [
Open settings — S
Text size and read line position have no shortcut assigned out of the box, but you can add one.
All of these can be changed: open Settings and choose Customize Shortcuts at the bottom of the drawer. You can assign more than one binding to an action, and bindings aren't limited to your keyboard — a connected gamepad button or a MIDI note works too, which is how a lot of people wire up a foot pedal or a presenter remote.
The presentation screen works on mobile, with a smaller bar: Start, Restart, video recording, Fullscreen, Overlay and Settings.
The Mode, Devices and Layout panels are hidden on narrow screens to keep the bar usable — everything in them lives in the Settings drawer too, so open Settings to change your scroll mode, speed, camera, microphone or script width.
Still stuck?
Email team@speakflow.com and tell us what device and browser you're on, and what you were trying to do. We'll get back to you ASAP.
Ready to try Speakflow?
Write a script, hit record, and read naturally. Free to start.