If you've used Speakflow for a while, you know speed controls lived in the footer toolbar, next to font settings and flip controls, while sync and device selectors hid behind a menu. Everything worked, but finding the right setting mid-presentation meant hunting through multiple spots.
In order to simplify the presentation screen and put everything in one place, we've consolidated almost every teleprompter setting into a single slide-out drawer. Same controls, better home. Nothing has been removed — it's all just easier to find.
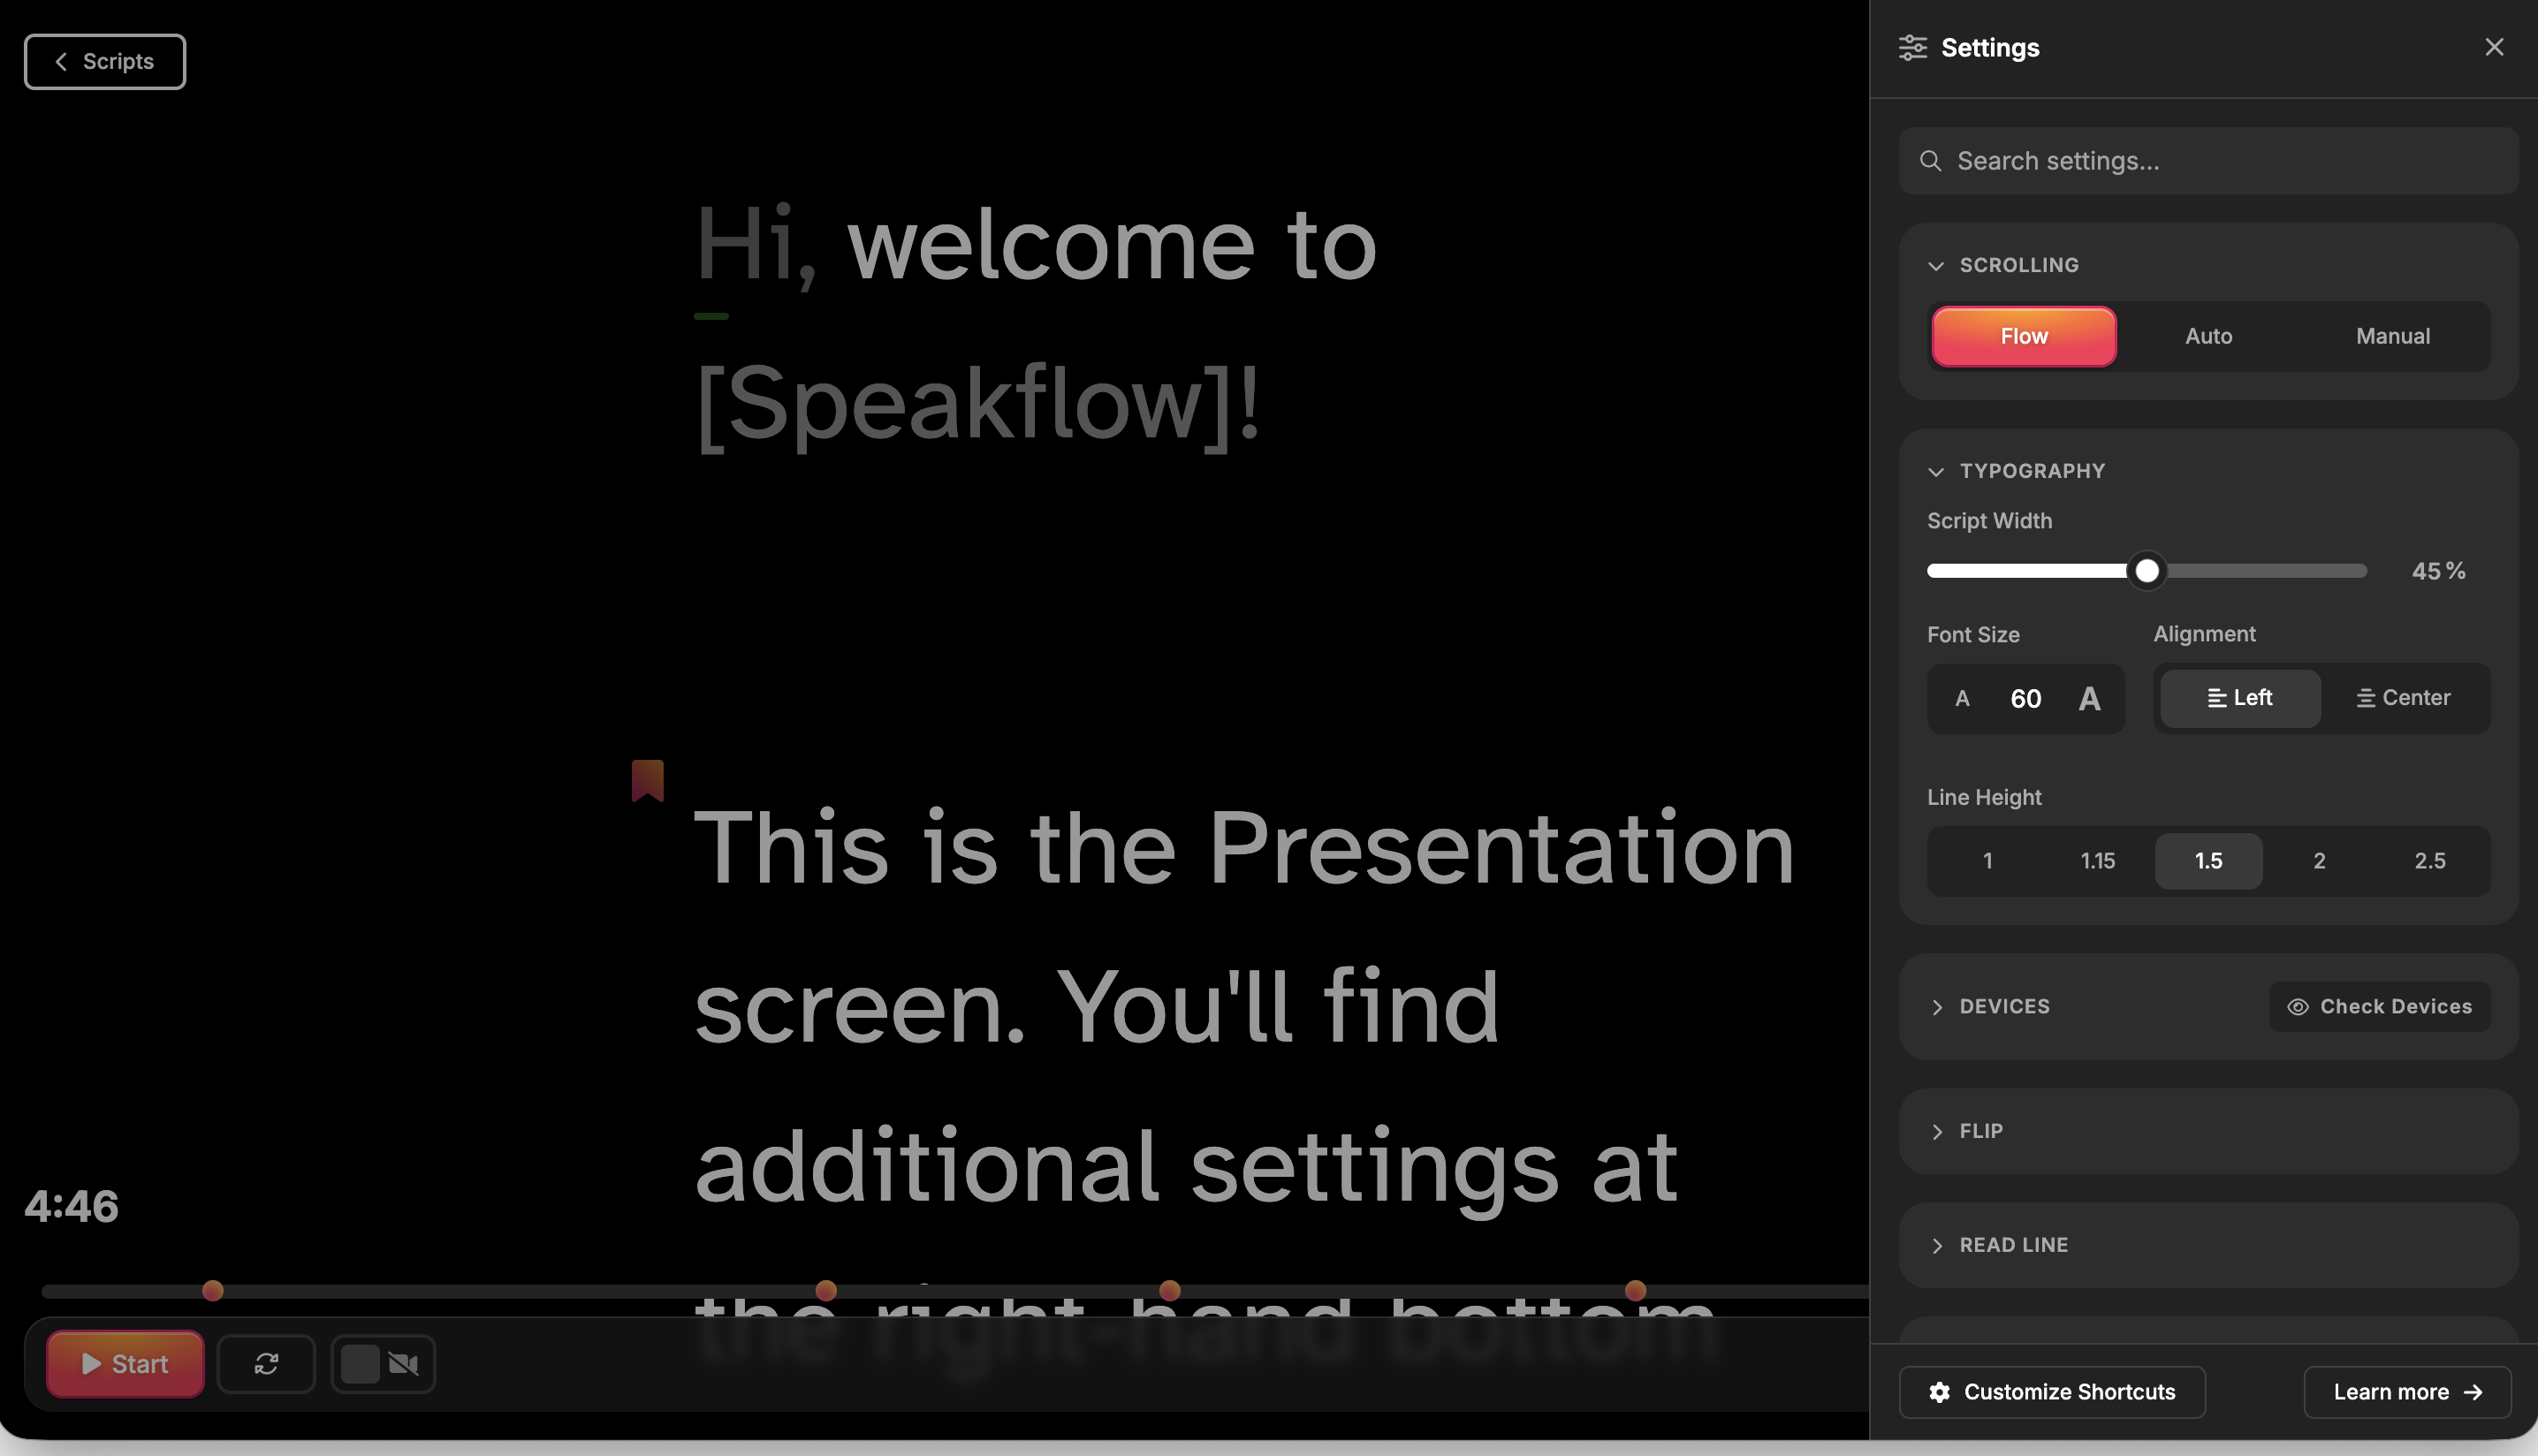
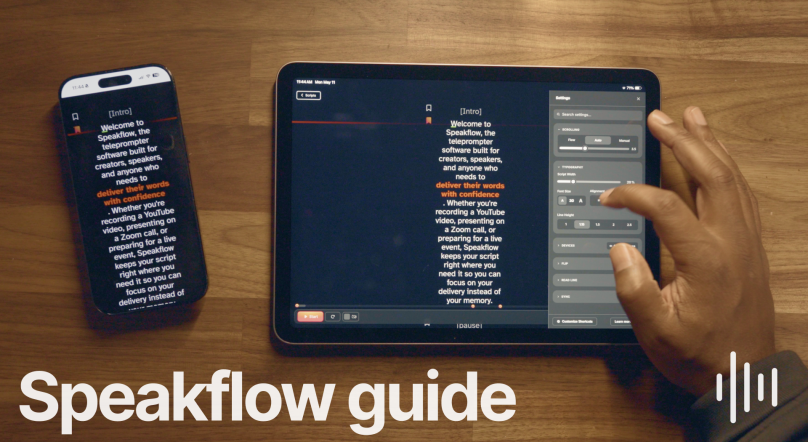
full-drawer-settings.png337.12 KB
Opening the Drawer
Look for the settings icon in the bottom right hand side of the presentation screen. Click it, and the settings drawer slides in from the right. Click it again (or tap the backdrop) to dismiss it. Simple as that.
The drawer remembers your last settings, so everything picks up right where you left off.
What's Inside
The drawer is organized into six collapsible sections. Each one has a header you can tap to expand or collapse, keeping your view clean. Let's walk through them.
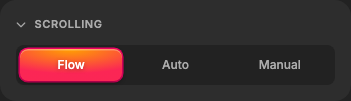
Mode selector
settings-scrolling.png6.78 KB
Flow
Voice-activated scrolling. Speakflow listens through your mic and advances the script as you speak. Great for natural pacing since the teleprompter follows you, not the other way around.
Auto
Constant-speed scrolling. Set it and the script rolls at a fixed pace. Best for pre-timed segments where you need consistency.
Auto-mode.gif19.54 MB
Speed slider — When you're in Auto mode, a speed slider appears (range 0–10, with half-step precision). The current value displays next to the slider so you always know where you're set.
You can also set the speed using number keys 1-9 or adjust the speed using the + and - keys on your keyboard.
Manual
You control everything. Use keyboard shortcuts or the scroll wheel to advance at your own pace. Ideal for interviews or Q&A where timing is unpredictable.
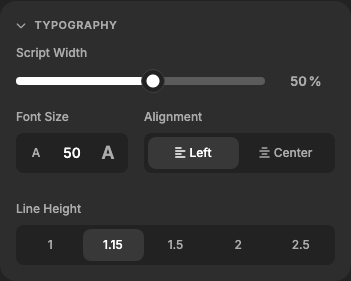
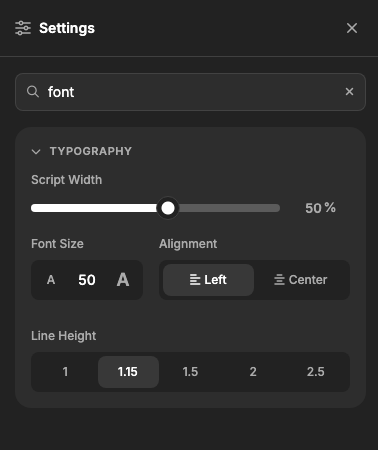
Typography
These are your most important controls and where you can make your script readable at any distance.
settings-typography.png11.27 KB
Script Width
A percentage slider (0–90%) that controls how much of the screen your text occupies. Wider for large monitors, narrower for a focused column.
Font Size
Tap the small "A" to decrease, the large "A" to increase, or type a specific pixel value directly into the field. Range: 10px to 250px. For a monitor three feet away, most users land somewhere around 40–60px.
Alignment
Left or center. Left alignment reads more naturally for most people; center works well for shorter scripts or when presenting to a camera head-on.
Line Height
Five options (1, 1.15, 1.5, 2, 2.5). Tighter spacing fits more text on screen; looser spacing reduces the chance of losing your place. If you're new to teleprompting, start with 1.5 and adjust from there.
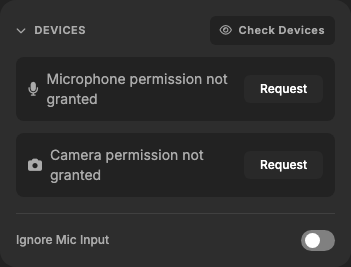
Devices
This section manages your microphone and camera — particularly important if you're using Flow mode (voice-activated scrolling).
settings-devices.png13.5 KB
Microphone selector
A dropdown listing all detected audio input devices. Pick the mic you want Speakflow to listen to.
Camera selector
Same idea, but for video. Useful if you have Speakflow displaying a camera feed alongside your script.
Device preview
Hit "Check Devices" to see a live audio meter for your mic and a video preview for your camera. Handy for verifying the right devices are selected before going live.
Ignore Mic Input
A toggle that tells Speakflow to stop listening to the microphone on this specific device. This is useful in multi-device setups: you might have one device running the teleprompter display while another handles voice input.
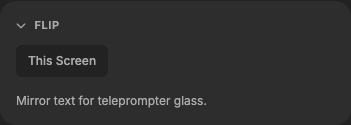
Flip
If you're using a beam-splitter or teleprompter glass rig, you need mirrored text. The Flip section handles that.
settings-flip.png4.67 KB
This Screen
Mirrors the text on the device you're currently using.
Remote Screens
Mirrors text on connected remote devices only (available on paid plans). This way, your control screen stays readable while the glass-mounted display shows properly reflected text.
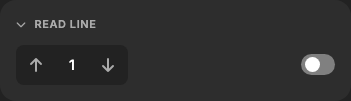
Read Line
The read line is a horizontal guide that sits across your script, marking exactly where you should be reading. Think of it as a finger following along under the words.
settings-read-line.png2.8 KB
Position stepper
Use the up/down arrows to move the read line higher or lower on screen. The number between the arrows shows the current position.
Show/hide toggle
Turn the read line on or off entirely. Some presenters love it; others find it distracting. Try it both ways.
Sync (Paid Plans)
Running Speakflow across multiple devices — say, a laptop for control and a tablet mounted on a rig? The Sync section is your command center.
View QR Codes
Generates QR codes that other devices can scan to join your session. No manual URL copying required.
Sync Device Width
Pushes your current script width setting to all connected remote devices. One click and every screen matches.
Finding Settings Fast
Don't want to scroll through sections? There's a search bar at the top of the drawer. settings-search.png17.62 KB Type a keyword — "font", "speed", "mic", "mirror" — and the drawer instantly filters down to matching sections. Hit Escape or the X button to clear the search and see everything again.
The search is forgiving. It matches against a broad set of terms for each section, so typing "velocity" finds Scrolling, "webcam" finds Devices, and "guide" finds Read Line.
One Drawer, Zero Guesswork
If you're an existing user, take a minute to open the drawer and poke around. Everything you're used to is still there.
Have questions or feedback? Visit our helpful guides or reach out to our support team. We'd love to hear how the new drawer is working for you.